SonarQube Overview
In this today competitive world, we want our software or service to be bug free and user friendly. User friendly in the sense that if something goes wrong it should throw understandable message for what’s going on rather than some random error which user has no idea about it.
Taking consideration in making our software bug free, SonarQube comes to rescue. SonarQube helps to provides an overall health of the system by looking into code coverage, code smells and security vulnerabilities.
For example, let’s take a Spring boot application, there is controller, repository, service and so on. We have to test all the classes where testing is possible to relatively lower the bug within the code.
Let’s jump into installation of SonarQube.
Traditional Approach to Install SonarQube in Windows and Mac
There are different ways to install SonarQube and run in your machine locally.
Install SonarQube in Windows
This is the traditional approach where we can download SonarQube from its official website. As per now, the latest version is 9.3.0.
You might also want to read:


- Once you download, extract the binaries and navigate to the following directory in your machine: \sonarqube-9.3.0.51899\bin\windows-x86-64
- Run StartSonar.bat through terminal
Install SonarQube in Mac
For Mac the process is quite similar like that of windows.
- Extract the binaries and navigate to following directory: \sonarqube-9.3.0.51899\bin\macosx-universal-64
- Run sonar.sh through terminal
Once you run the commands in windows or mac, you can see sonarqube is running. Go to browser and type: http://localhost:9000 to access SonarQube dashboard.
Issue you might face while running SonarQube:
You need to update Java path in conf/wrapper.conf file with command: wrapper.java.command=”Path of your JDK” in my case it is C:\Program Files\Java\jdk-11\bin\java
You need to update your java path with wherever JDK is installed.
Install SonarQube using Docker Image
This approach works both for Windows and Mac. You need to have docker installed on your machine and you can simply pull docker image. The command for pulling docker image is:
- docker pull sonarqube
- It will pull the latest image. To run the sonarqube with the pulled image, you need to run the following command. docker run -d –name sonarqube -p 9000:9000 sonarqube
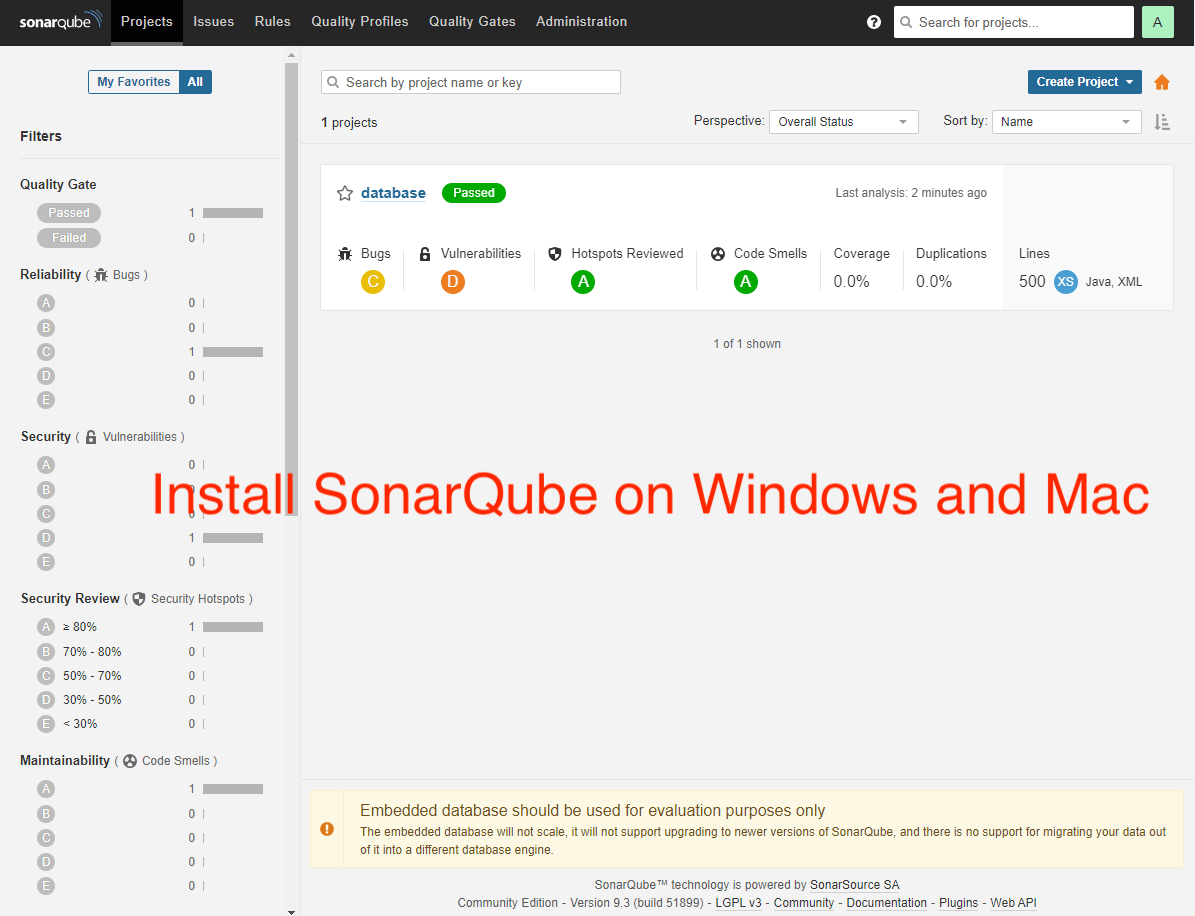
Once the instance is up and running, login using default administrator credentials(user and password both as admin). After you login, you will be prompted to change your default credentials and once you change it, you are all set to play with sonarqube. This is how it will look like once you hit http://localhost:9000.

Upload Project to SonarQube
There are different options to create a project: gitlab, github and many more. You can use the existing one or the manual approach. I will be using manual approach for now and will push the code locally. I have created a project named database.

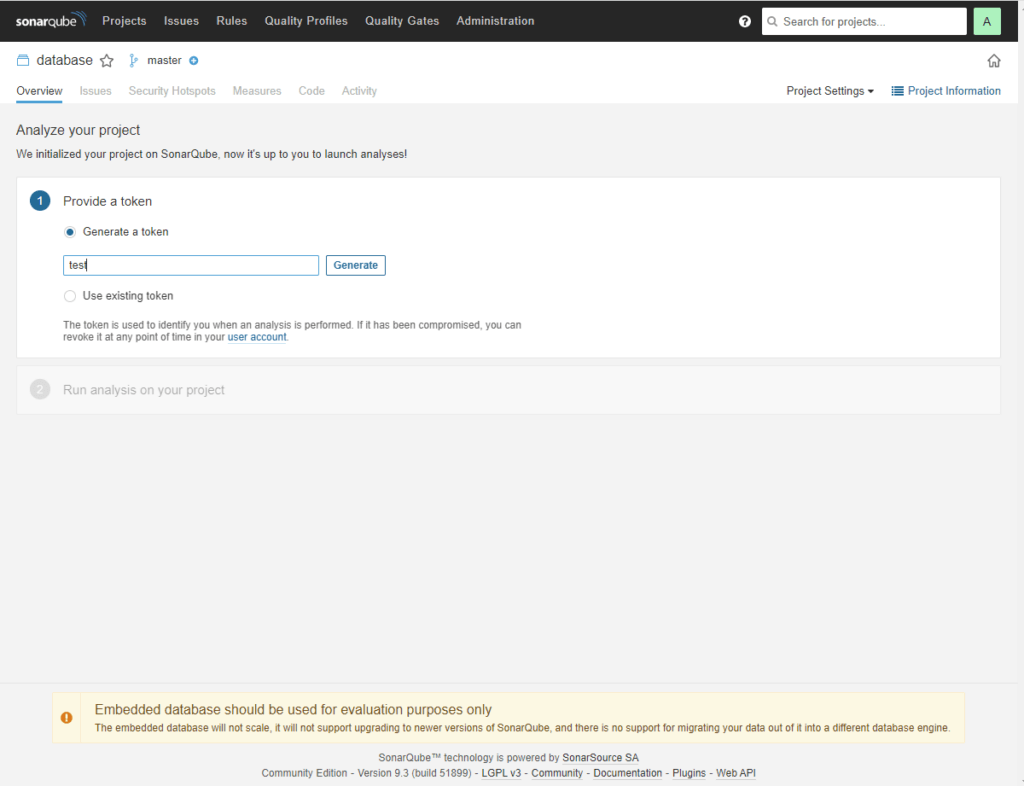
To analyze project locally, we need to generate a unique token which will be used to authenticate and upload to sonarqube. This token is used for uploading the analysis result to SonarQube GUI. You can pass whatever name you want to generate token.
Push Code to SonarQube with Sonar-Scanner
There are different ways we can push project code to SonarQube like using Maven, Gradle and many more. Here we will be using Sonar Scanner. Again there are two ways to install sonar scanner. One is traditional approach by downloading zip file from the official site and the next is by pulling sonar scanner image.
Once you unzip the file, inside conf you will see sonar.properties file which we need to update it as below.
# must be unique name within SonarQube
sonar.projectKey=your-project

# --- optional properties ---

# defaults to project key
#sonar.projectName=Your project name

# Path is relative to the sonar-project.properties file. Defaults to .
#sonar.sources= path of your project like C:/Users/Project
Now you are all set. Since we have sonar already running on the port 9000, we will use the same port to push the code.
Once you are inside bin folder, you will be able to run sonar-scanner command :
sonar-scanner -Dsonar.login=myAuthenticationToken
This is the same token which is generated in the earlier step.
Push Code to SonarQube using Maven
To push code from maven project, you simply need to run following command:
mvn sonar:sonar -Dsonar.host.url=http://localhost:9000 -Dsonar.login=the-generated-token
Push Code to SonarQube using Gradle
To push code from gradle project, you simply need to run following command:
./gradlew sonarqube \
  -Dsonar.projectKey=database \
  -Dsonar.host.url=http://localhost:9000 \
  -Dsonar.login=myToken
We also need to import the plugin before running the command.
mvn clean verify sonar:sonar \
  -Dsonar.projectKey=database \
  -Dsonar.host.url=http://localhost:9000 \
  -Dsonar.login=myToken
plugins {
  id "org.sonarqube" version "3.3"
}
Conclusion
In this post you learnt what is SonarQube, why is it necessary, how to install in on your local machine and finally how to push your project to SonarQube. This is just the start as there are many things you can do in SonarQube.